How to Draw an Italian Palm Tree
Continuing with the tropical theme, let's draw an island with a palm tree or two. And a sunrise. And a hammock. Castaways Welcome.
If you've ever wanted to quit your job and run to a remote, tropical place to find some peace and quiet, this island is for you. We'll even throw in a hammock for naps. I can't promise delivered meals or coconut drinks, but anything can happen on an island like this one.
Did you know that painting, drawing, and getting artistically visual helps you calm down, destress, and rejuvenate? (I enjoyed reading this article about it.) Maybe that remote island isn't as far away as you think.
Ready to find yours? Let's get started.
Gather your supplies
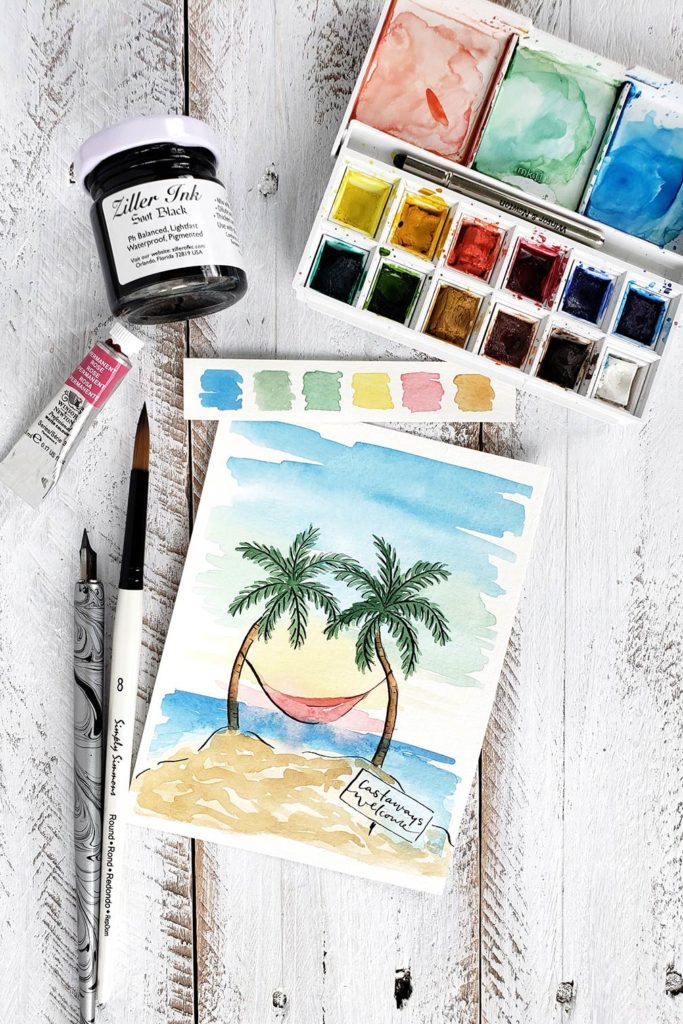
- Basic calligraphy supplies with Ziller ink
- Basic Watercolor supplies
- Winsor & Newton Cotman Sketcher's Pocket Box
- Permanent rose pink, for mixing
- How to Draw an Island Worksheet set, optional
Read on for extra details and hints or jump to the tutorial video.
Watercolor Sky Background
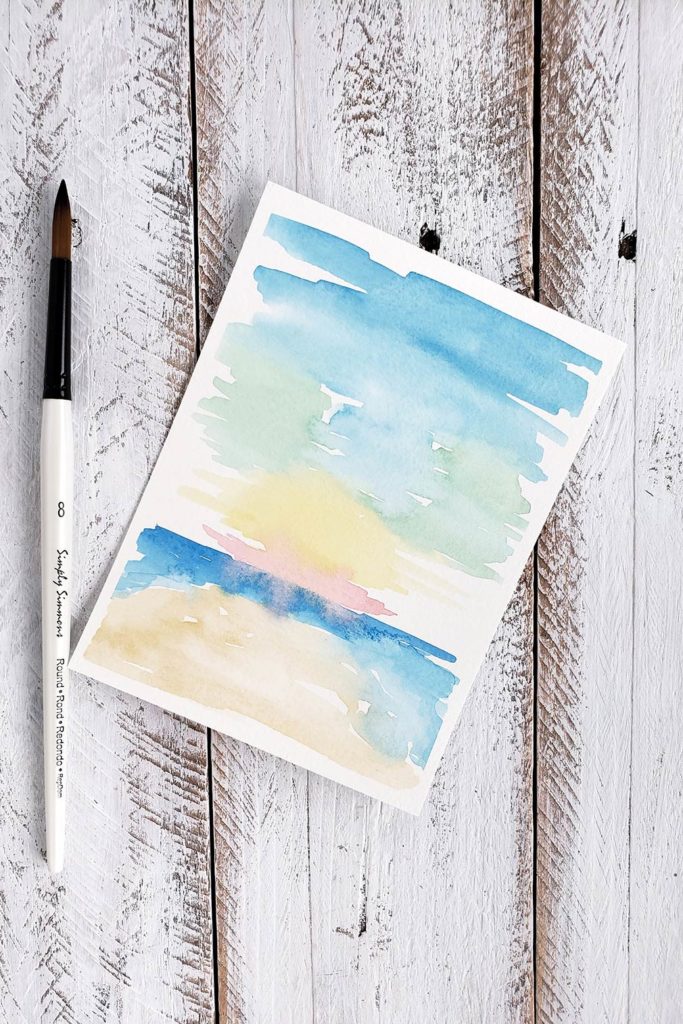
Start with a watercolor background. It will be wet over most of the page, so it's a good idea to tape your watercolor paper to an artboard.
Feel free to do your own kind of background or none at all (simple is beautiful too). I want to create a background that flows from the final drawing and has a bit of a sunset look.
Before you begin, visualize your drawing: sizes, shapes, colors. As you paint, use colors in the approximate size of the drawing, in the approximate area, with a lighter tint of the color creating an abstract feel to the watercolor background. I'll show you what I mean.
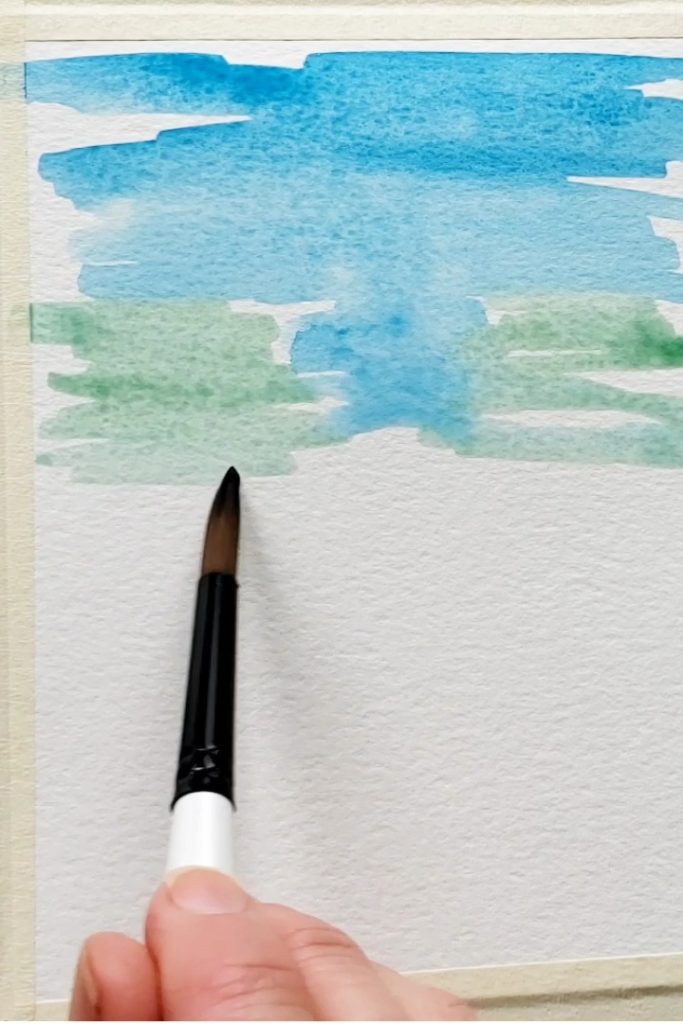
Start painting in blue at the top of the page and work your way down. I'm drawing two palm trees on the island, so about a third of the way down the page, I'll paint the blue only in the middle. Then, while the paint is still wet, I change my color to green on either side of the blue.
Why? Because my palm leaves will be approximately in these locations.
Watercolor Sunset Background
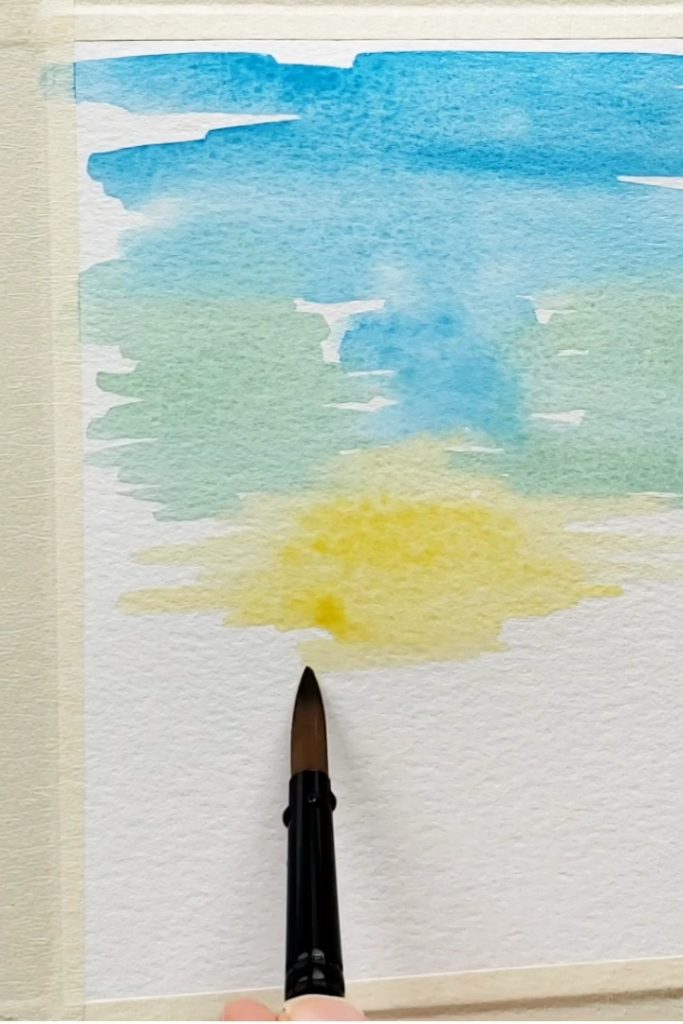
Next, I'll use yellow watercolor over the area just below halfway down my paper and paint up to the green and blue areas. The sun is coming up.
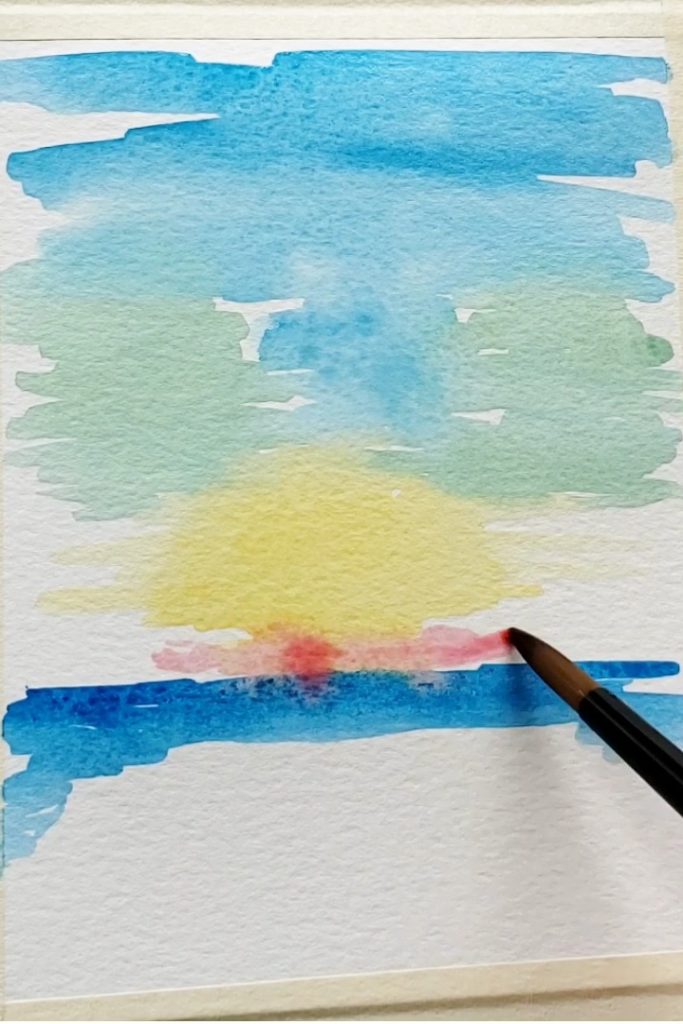
When the sun rises, it touches the horizon at the ocean level, so the next area will be a darker blue for the ocean. Paint it straight across the page about two thirds the way down and lightly touching the yellow. Then, paint the sides of the ocean a little lower like they are coming around the island.
My island has a pink hammock strung between the palm trees, to symbolize a truly relaxing stay, so I will paint a light pink over the part of the yellow touching the blue ocean. In this way, the color will create a background for the hammock and add to the sunrise look.
Finally, the island needs an island, so paint some lumpy looking sand below and touching the ocean.
Let it dry completely before you continue.
Draw a Palm Tree (or Two)
Now, it's time to draw the island with a calligraphy pen. Draw in pencil first. When you switch to a calligraphy pen, remember to vary thick and thin strokes to accent different areas or add a hint of a shadow.
Below are some ideas to get you started as you draw. (If you'd like ideas in printable form, look for these How to Draw an Island Worksheets.)
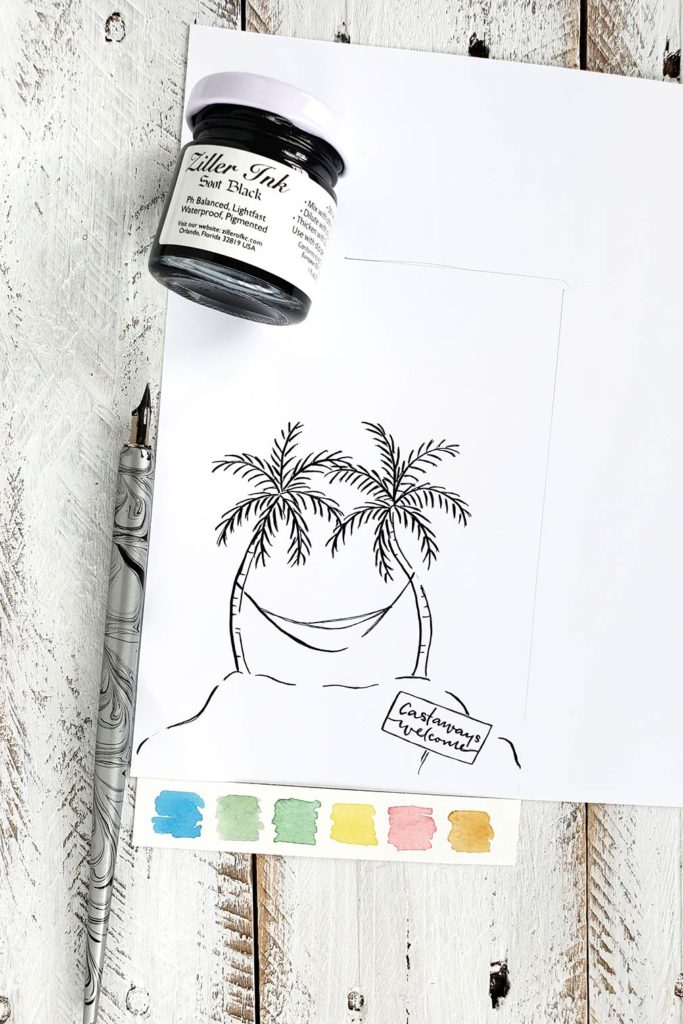
When using a calligraphy pen (or any wet medium) it's a good idea to start at the top of your drawing and work down. Keeping that in mind, start drawing your palm trees, leaves first. The branches all start at the top of the palm tree trunk and wave out, forming a circle, kind of like a flower. Draw lines on each side of every branch for the leaves that hang down and blow in the wind.
As you draw the trunks, remember that palm trees don't always grow straight. Feel free to give them a little curve or two. Add a few lines across the trunks for accents.
Finally, draw a hammock between the trees. It's all ready for a good snooze.
Draw an Island with a Welcome Sign in Calligraphy
Draw an island next. It can be as lumpy as you would want your sandy remote island to be.
Then, just for fun, draw a little welcome sign. Use calligraphy script to write, "Castaways welcome," on it.
Let the ink dry completely before moving on.
Add More Watercolor
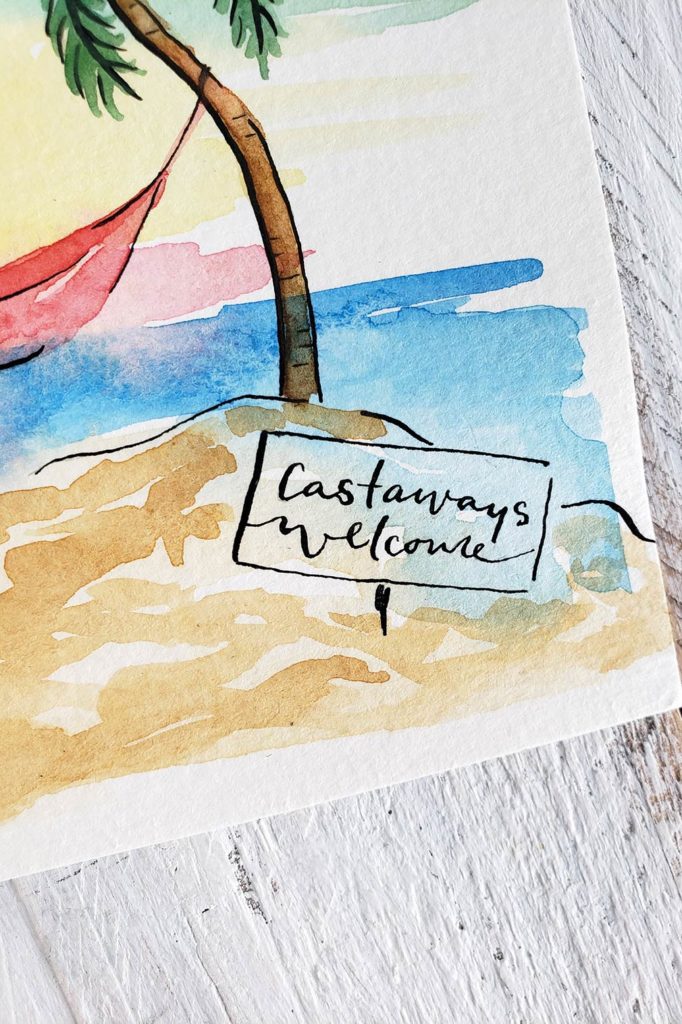
Sometimes a drawing looks amazing on a watercolor background by itself. But this time, I want it to pop off the page, so we'll add a couple more layers of color.
Work from top to bottom, starting with those palm leaves. Use a darker green paint to follow the shape and lines of the leaves. With a small brush, paint around and between the lines you made with your calligraphy pen. The palm branches will start to fill out.
(In the video, I painted a light brown on the palm tree trunks before painting the palm tree branches. In hindsight, it wasn't really necessary. Leave it in or take it out … it's up to you.)
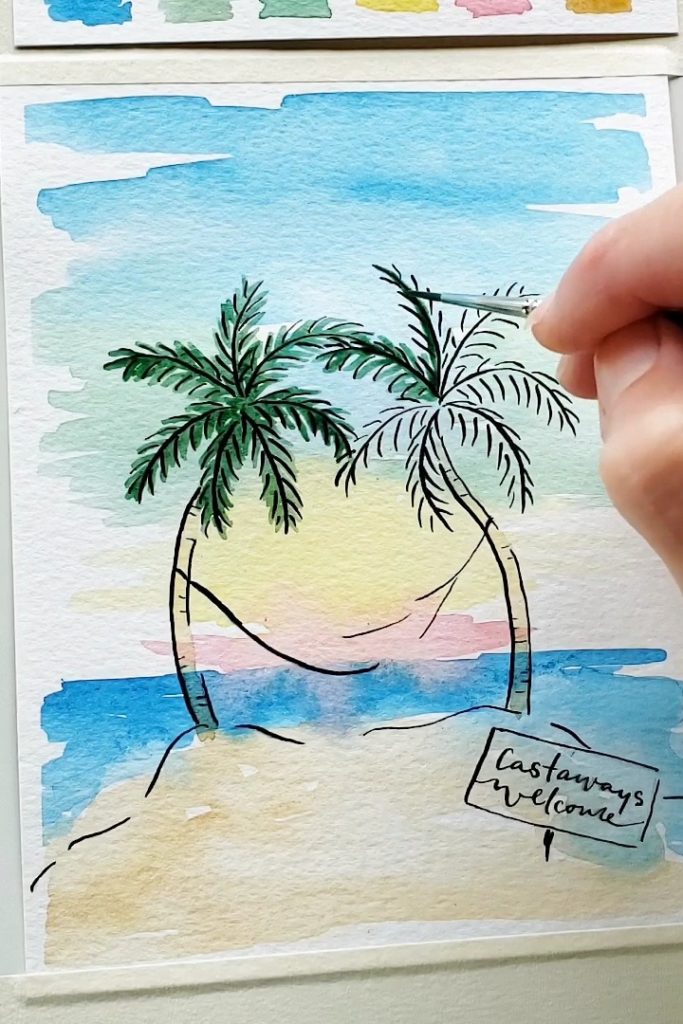
Now, you're ready to add a darker brown to the trunks of the palm tree drawings. Try to keep it darkest on the left sides of the trunks. It will kind of blend together, and that's okay.
Paint the hammock a darker shade of pink next. Then, It will get one final layer to make the inside stand out from the outside, but we have to wait for this layer to dry first.
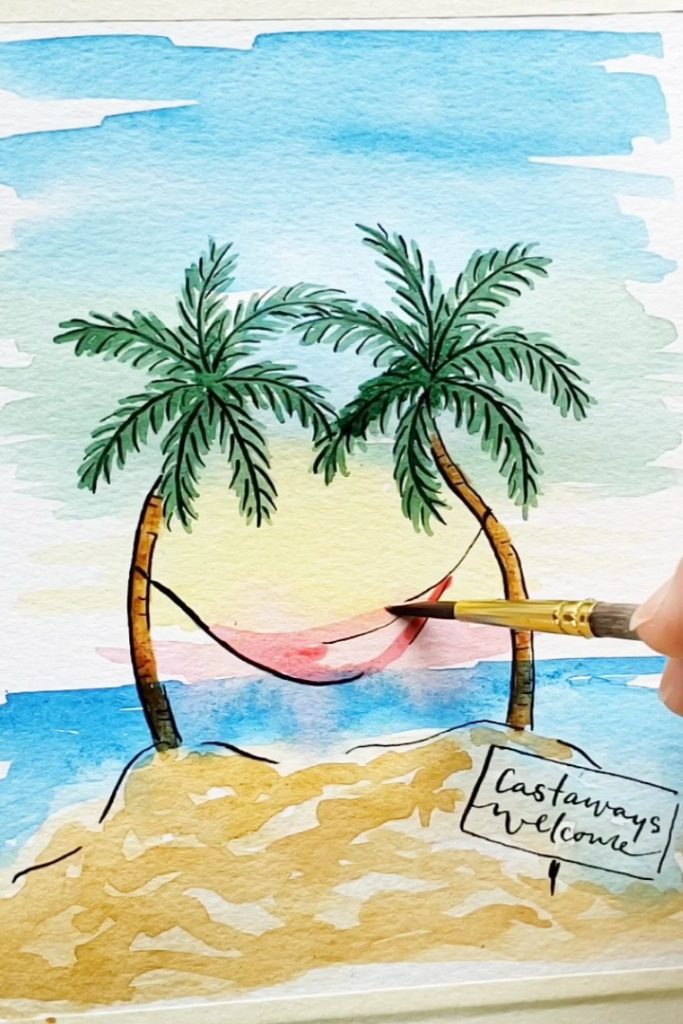
Last, paint the sand with a darker sand color, leaving areas of the background show through to make it look more like sand disturbed by footprints.
When the hammock is dry, paint one more layer of pink to show off it's center sleeping area.
And you're finished! I hope you feel more rested already.
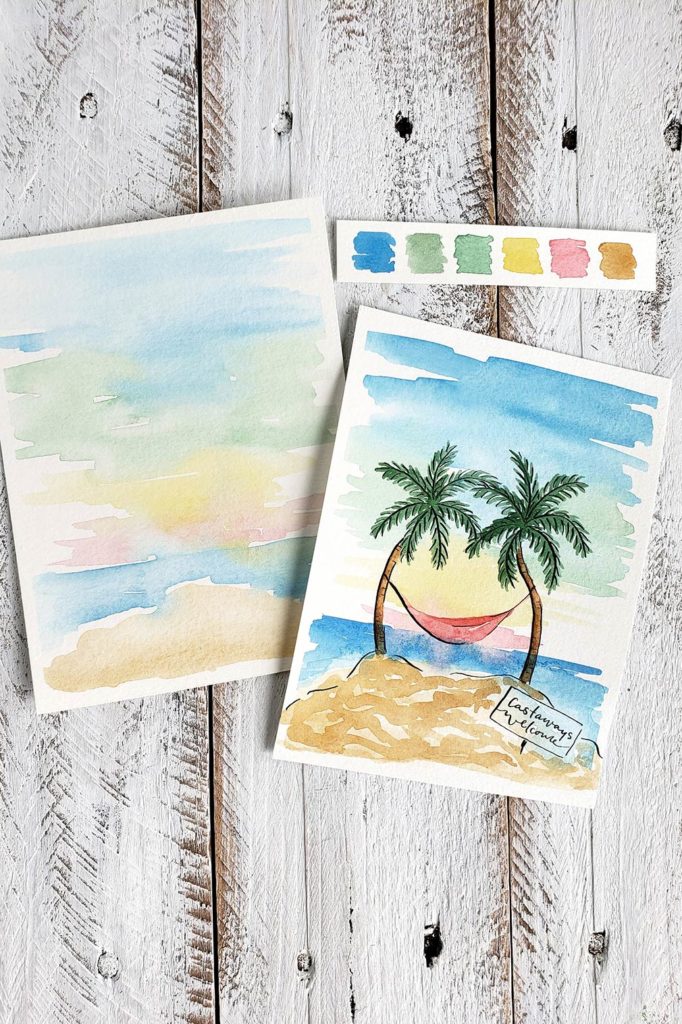
Watch How to Draw an Island with a Palm Tree (or Two)
Now, go ahead … paint another one.
Enjoy the process,

Source: https://joannegroff.com/how-to-draw-an-island-with-a-palm-tree-or-two/
